|
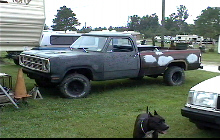
Do-it-Your self Bed Liner & Undercoating. A couple months back I found an ad in the local paper that described a truck for sale that had a 360 engine. No make or model, just the year, 1972. I ignored it at first but figured it had to be a Dodge. A few days later I went back to the ad and figured I would call the guy just for fun. We ended up talking for almost 40 minutes about Mopars and how his wife was applying the pressure to get rid of the eyesore. From what he had told me it was running great but needed some work and a good paint job. A week later I towed it back home and began to work on some cosmetics. The bed of the truck had long rusted away so the one that was on it was not stock and needed a little T.L.C. Below is the picture of the bed removed from the truck. I planned on keeping this truck for a while so I undercoated the entire bottom with spray on undercoating. I coated the underside of the bed with a nice thick moisture barrier. 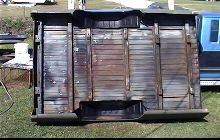 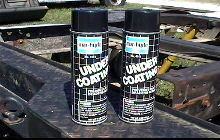 Here is the underside of the bed prior to the application of the undercoating. This is the product I used; it comes in 3 varieties, regular, rubberized, and paintable. I used the regular flavor. I found this undercoating on sale for $2.00 a can. The entire bed took about 6 cans to completely cover every sprayable surface. $12.00 is pretty cheap rust prevention insurance. A double coat would have been twice the protection but I felt that a single coat was sufficient thickness for my needs.
Before application, I used a stiff scrub brush and small amount of dish soap to remove any dirt and oil. After a few hours in the sun, the surface was dry enough for the first coat. I was not concerned with over spray because I was in the grass and knew I still had bodywork to do on the sides. This spray on undercoating is messy stuff and will NOT come out of your cloths. So, if you want to prevent lots of aggravation and extra work, mask any areas that you do not want to hit with this black goop. It will get everywhere. If possible, remove any parts from the vehicle that will be sprayed and wear some protective old clothing that you dont mind sacrificing.
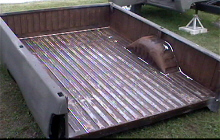
I sprayed on a thin layer and let the thick liquid settle down into a smooth finish. Some spots, like under the wheel wells, were sprayed with an extra coat for added moisture protection. I wanted the undercoating to go on thick and run down into the areas where I could not directly spray. When first applied, it looks dark brown then dries to a matt black. Below is the undercoating after an hour of drying.
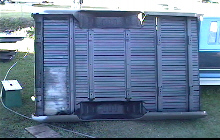  The bottom left corner was where I ran out of undercoating. The lower photo shows up close the dried version. It dries to a rubbery tar like consistency. Its not sticky but can be easily scraped off if you scrape over some rocks or gravel.
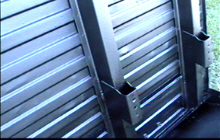
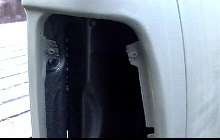
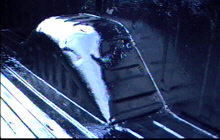
Once the bottom of the bed was protected from water damage I sprayed as much as I could into the upper sides of the bed and behind the taillights. The photo below is where I sprayed he liner back behind the taillight lenses.
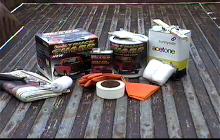
 Protecting the underside of the bed from moisture was relatively simple, but the bed, where cargo was to ride, needed a more durable protection, one that would keep the moisture out and be almost bullet proof. I decided on Bondos Truck Guard. Most auto parts stores will carry it. I paid about $60.00 for the Model # 726. It came with one gallon of Roll on bed liner, enough to do a long bed and tailgate, drying agent, paintbrush and instructions. There is another kit, Model # 727 that comes with everything you will need. I recommend Model # 727 if you can find it. If you cant find it, you will need several additional items.
Mixing blade or paint stirrer
Sanding sponge
Solvent-resistant paint roller
Paint roller handle
Paintbrush
Solvent-resistant paint tray
Solvent-resistant rubber gloves
Roll of masking tape
Several sheets of newspaper
Acetone or Xylene
Clean rags
For this product there were a few details that were important but easily over looked. When mixing the liner with the drying agent, you must use ALL the drying agent or the liner will not dry or cure. Use this product only in a well-ventilated work area. Do not smoke or use the product near open flame or any possible source of ignition. For safety it is recommended that a paint respirator, eye protection and solvent-resistant gloves be used. Do not use below 60 degrees F. Bondo provided an excellent set of step-by-step instructions that were simple and easy to follow. The liner went on smooth and dried to a smooth glossy finish. Bondo suggested adding some playground sand to the liquid to create a slip resistant finish.
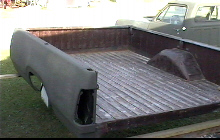
 The first thing was to clean the bed by removing all loose debris and scrubbing with a soapy solution and stiff brush. Next I used a sanding sponge and hit all painted surfaces to rough up the surface. When it was dry, I filled in any gaps where the old weather stripping had dried and come loose. I used a paintable 25-year calk but neglected to give it enough time to dry. This caused some problems later when applying the liner. The photo on the top is the bed after the washing and the one on the bottom is after the application of the 25-year calking.
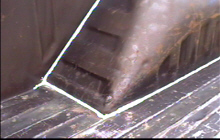
Here is a close up of the calking in the seams. I could have skipped this step but I was working on making this bed last for the long haul and wanted to seal any and all gaps.
After the calking was applied I masked the areas that I wanted to protect from the liner. I chose to have the bed liner go up and over the bed rails. 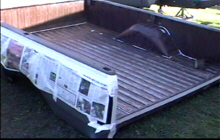 After the masking was done, I mixed the liner and curing agent and began, with a paintbrush, to apply the liner on hard to reach areas like under the lip of the bed rails and in corners where the roller would not to go. Once that was done I began with the roller doing the sides of the bed and front of the bed then the deck, working my way back. The instructions gave a four-hour window where the mix would be workable before curing. It took me about an hour to cover the entire 8-foot bed. Twenty-four hours was recommended for curing and forty-eight before use.
The day I applied the liner was warm and sunny with no hint of rain. Any water that came in contact with the curing bed liner would leave a grayish appearance so I covered the entire bed with a large plastic drop cloth and used cloths pins to secure it in place. This proved to be a wise choice because 4 hours after I had gone to bed the rain came. There were a few spots near the ground where the bed liner was sprinkled with rain and turned gray but they were so small that no one would notice. Bondo suggested waiting 30 minutes before removing the masking to allow for easier removal of the tape.
Clean up was the easy part. I disposed of the rollers and paintbrush and cleaned up with acetone.
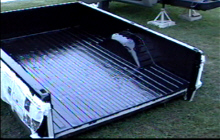  Once the bed liner had cured it left a very glossy smooth finish. I opted for not adding any sand.
The project was relatively simple and provided great results. I plan on using the Bondo to cover the inner cab floor and walls to provide a water proof barrier and prevent the Curse of the Dodge Trucks floor rot. In my opinion, Bondo makes an excellent bed liner if you are looking for a high gloss finish. A similar product Hurculiner is available at Napa and K-Mart. They advertise their product for $100.00 but I found it at K-Mart for $78.00 and I think I would prefer the finished product of Hurculiner in the truck bed and the Bondo product in the cab area. When applied with a brush, the Bondo Bed liner dried to a very smooth glossy finish that would last for years under normal traffic and even longer under a carpet liner and carpet or vinyl. The Hurculiner bed liner dries to a skid resistant surface and is not glossy. Here in the near future I would like to try the Hurculiner Bed liner and will provide a better comparison then.
|