|
Hey Guys, I am assuming a few things about your rebuild so, before I waste any of your time I am making the following......
Assumptions:
1. Your steering box is leaking from the front/top of the steering box where the steering column connects to the box.
2. Your steering box is still attached to the truck.
3. You have a second vehicle to drive while the Ram is deadlined.
When I did my rebuild, It took me about 2 days because the instructions were a little bit more helpful than the back side of a box of Capt Crunch cereal. I removed the entire thing and found out later that I could have done it with the box in place. So, here goes:
Parts list: Rebuild kit or front gasket/seal and dust cover. I dont have a part numbers, I just bought the entire rebuild kit from auto parts store. I think it was about $20.00 or so. I ended up not using a few parts cuz I didnt need to and didnt want to tear it completely apart. Besides, if its only leaking from the top, like mine, it wont need to be rebuilt.
A hand full of shop/oil rags.
At least 2 bottles of pwr steering fluid.
1 can of gunk or similar engine cleaner.
Tools: Sockets, wratchet, Large adjustable wrench or large pipe wrench, hammer, flat tip punch.
Before you do anything, hit the entire steering box assembly with at least half a can of gunk to remove any oil/grease. This will make the work a cleaner job. Plus it makes looking for parts, nuts, bolts easier. Let is sit for 30 min, hose it off and do it agian hit with a wire brush for the thick stuff and 30 min later hose the thing again. When it is dry start the operation.
Remove the steering column from the stub shaft on the steering box, or the upper end. There is a small pin that is driven into the bottom of the steering column and locks the stub shaft and column together. It is gonna be a pain to remove so take your flat tip punch and you must use a flat tip or you will flair the pin and make it unserviceable. If you dont have one use one of those small sockets that is too small for any usefull purpose and drive it out with that and a hammer but keep it straight so you dont damage the pin. Once you get the pin out, its about an 1 1/8 inches long, the shaft will be able to be pried or knocked loose. If not you may have to remove 2 of the 3 bolts holding the mounting bracket to the chassie and loosen the third. If you cant get the steering shaft/column off or loose from the steering box, do this first.
Take your adjustable wrench or pipe wrench--I would use an adjustable to avoid damaging the upper edges of the steering gear cap--and try to loosen the upper steering gear cap. This will most likely be a real biotch to get loose. Mine was on the ground and I had to work it and soak it in penatrating fluid then bang on it with a hammer to loosen it up. Once you get it loose, the hard part is done.
If there is NOT enough clearance to remove the steering shaft from the steering box, you will have to remove 2 of the 3 bolts on the mounting bracket. To do this--dont freak out now--you will have to remove the radiator. I know its a pain but there is no way to get to the forward bolt with the radiator in the way. So, if your hoses are in need of replacement, now would be a good time to replace them as well as your thermostat. Drain the fluid from the radiator/engine and disconnect the hoses. Remove the radiator and store it someplace where someone will NOT back over it or step on it. They are kinda pricy and it never fails that it gets damaged when its removed. Once it is removed, you will be able to access the forward bolt. Loosen the forward bolt and remove the two rear bolts, let the mounting bracket rotate downward till the steering shaft seperates from the stub shaft of the steering box. Place a drain pan under the steering gear and remove the upper cap. All the fluid might leak out from the pump tank but thats ok. Once the steering shaft is disconnected from the steering box and the fluid has been drained, you can temporarily install the mounting bracket and two rear mounting bracket bolts and nuts in their original position.
NOTE: IF NECESSARY, YOU MAY HAVE TO REMOVE ALL 3 MOUNTING BRACKET BOLTS TO MANIPULATE THE BOX AND STEERING SHAFT APART WHILE IT IS CONNECTED TO THE STEERING LINKAGE.
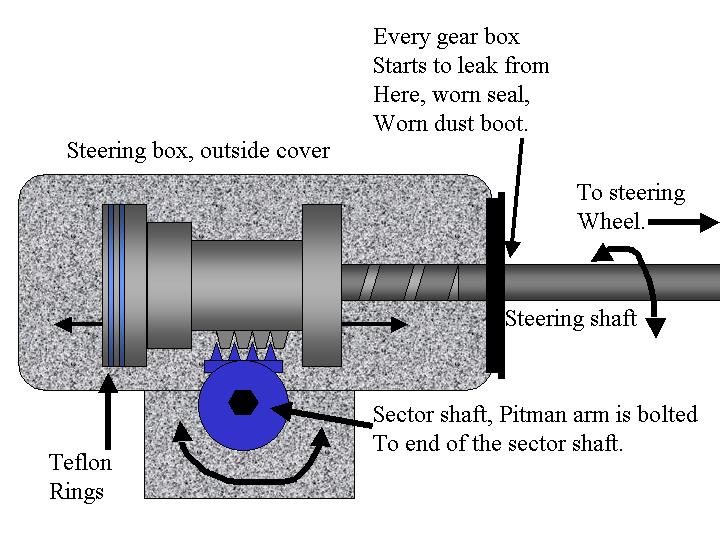
Inside there will be a thin (dust seal), Stub shaft seal and possibly a retainer but I don't recall a retainer. The order of removal will be: 1. Upper cap 2. retainer 3. dust seal 4. Stub shaft seal. This stub shaft seal is the important one that is leaking like mine was. If you can, find a replacement for that seal. That is really all you need, well, you will want a new dust seal too so buying the kit or just the seal will be your decision. My dust seal was damaged so I kinda had to get the kit. Take note of how deep the seal sits in the chamber so when you replace it you can drive it in the same distance. The seal will be diffacult to remove because its real small, about the diameter of a .50 piece. a regular seal puller might not work. Some sort of hook that can be worked around would do the trick but go from side to side to avoid causing to much damage to the seal. Once you have the seal out check for any debris and clean the end out. Install your new seal and using the flat end of a same diameter socket, gently dirve/tap the seal into the same position the old one was, then install the dust seal where the old one was and install the retainer and upper cap of the steering box. Tighten down the upper cap with your adjustable wrench and snug it down firmly. Remove the two rear bolts from the mounting bracket, rotate the steerin box down and reattach the steering shaft to the steering box stub shaft ensuring the splines are lined up perfectly so you can reinsert the locking pin. NOTE: ENSURE YOU VISUALLY CHECK THAT THE NOTCHES LINE UP OR THE PIN WILL BE MISALIGNED AND YOU WILL BEAT IT TILL IT IS UNSERVICABLE. A girlfrind is invaluable when working on this part cuz unless you have 3 hands its a biothc to manipulate.
Once the shafts are lined up, drive the locking pin back into the hole with a flat punch avoiding flairing the end. Tighten the 3 mounting plate bolts and reinstall the radiator, hoses, thermostat if necessary and coolant. Wipe off any power steering fluid that was leaking or spilled. Wipe off the entire steering box so you can easily check for leaks later. Check for leaks in your coolant lines and snug any leaky hose clamps down. Fill the powersteering pump resovoir with steering fluid and with the engine running turn the wheels to the left and right to allow any bubbles to escape the steering box. Allow the engine to reach normal operating temp and check again for coolant leaks and then take the beast for a drive around the block going easy on the steering until you know it is working properly. If you did everything correctly, your new seal will keep the fluid inside the steering box where it belongs. June 30, 2002 Update
Gear box seal replacement
1972 Powerwagon
The above description is for a 1979 Dodge Ramcharger where the rag joint is mounted near the firewall. The below photos and description are for a set up on my 1972 Powerwagon that has the rag joint mounted right on the steering box. Both procedures are about the same and both can be done without removing the steering box. I removed the box from the Ramcharger and did the seal replacement with the box still attached to the Powerwagon. I did have the fenders and inner wheel wells removed from the Powerwagon for other reasons so while I had it torn down I did the seal replacement. With some determination it can be done with with truck in tact. I would recomend removing the tire to provide better access.
To replace the dust boot, inner seal, and O-ring, you will need to disconnect the steering shaft from the steering box. Clean the crud from around the top of the box where the steering stub enters the box. Place a bucket or oil pan under the steering box, you will lose some fluid when you remove the piston. With a pipe wrench or spanner wrench, remove the upper lock ring and cap. They should come off together but sometimes they wont. Pull the Piston from the box and replace the O-ring with new one. Remove the snap ring from the top of the cap, and wipe all excess dirt and grease from the area. Pry the dust boot and seal from the top of the piston. Again, wipe the area down. Coat the new seal and install into the cap, tap it in with a socket that is just a little smaller than the diameter of the seal. It will seat, make sure it is flush all the way around. Install the dust boot and push is flat against the seal. Install new snap ring. Wrap one layer of electrical tape around the stub shaft to protect the new dust boot when you install the piston. Install the piston, cap and lock ring, tighten it down till it seats. Install new rag joint and then attach the steering shaft to the gear box. Fill the powersteering pump resovoir with steering fluid and with the engine running turn the wheels to the left and right to allow any bubbles to escape the steering box.
| Photo 1 |
|
|
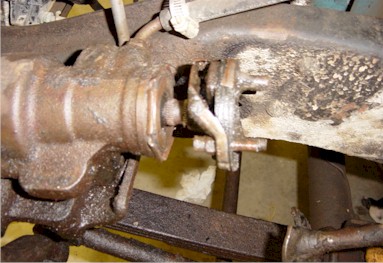
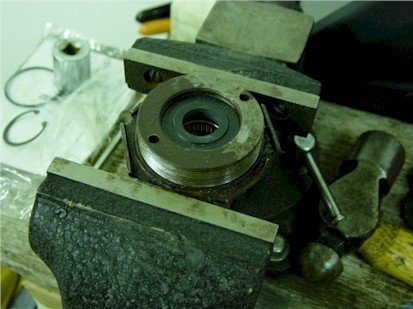
| Remove the lower coupling or ragjoint. On mine, 1972 Powerwagon, the rag joint is on the bottom. |
| Photo 2 |
|
|
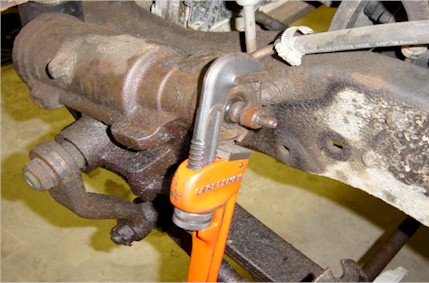
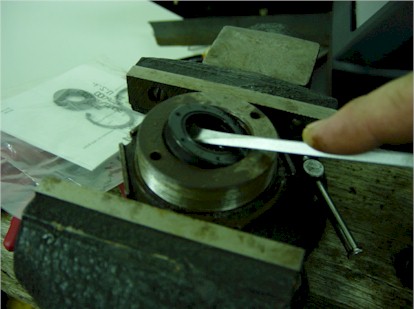
| With a pipe wrench, remove the lock ring. I made a spanner tool to help. See below. |
| Photo 3 |
|
|
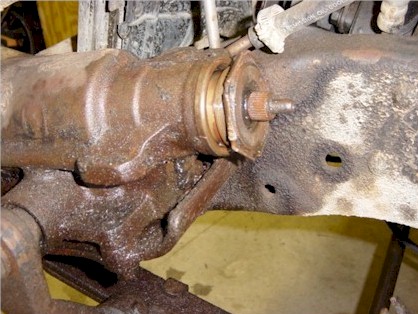
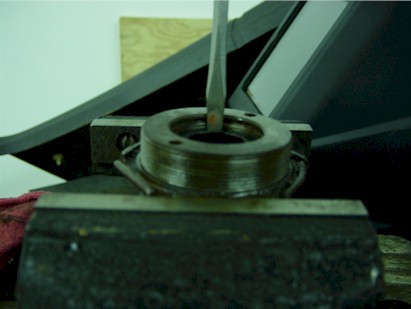
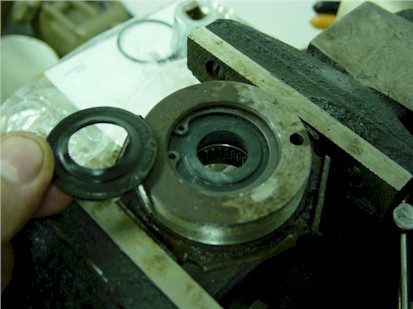
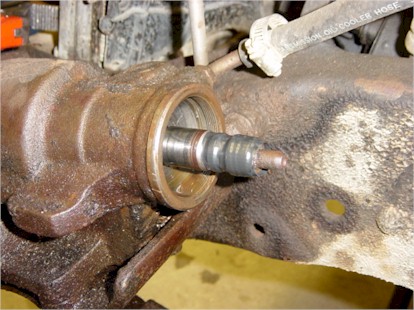
| Once the lock ring is loose, you can remove the upper piston for better access. |
| Photo 4 |
|
|
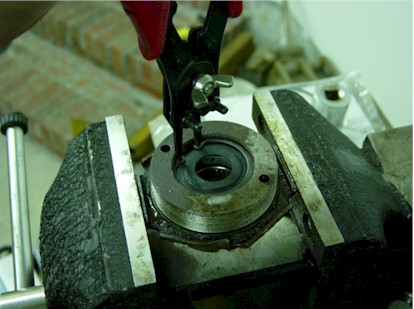
| Remove the crud, remove the snap ring, and pry the boot loose. |
| Photo 5 |
|
|
| If you are unsure how deep to drive the seal, take a measurement PRIOR to removing the seal. |
| Photo 6 |
|
|
| Wipe any crud from around the area and coat the outter edge of the seal with oil, push it down in. |
| Photo 7 |
|
|
| Using a socket just about the same size as the seal, gently tap it down till it seats. |
| Photo 8 |
|
|
| Install the dust boot flush with the seal. |
| Photo 9 |
|
|
| The old dust boot is no longer elastic, it was dry and brittle. |
| Photo 10 |
|
|
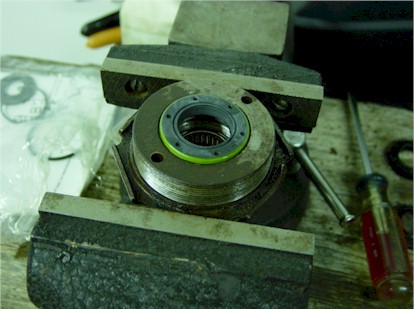
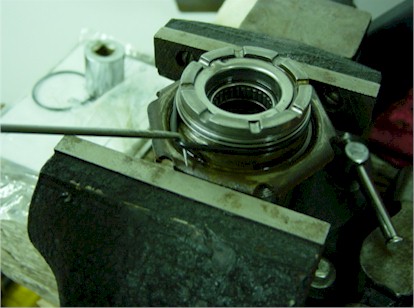
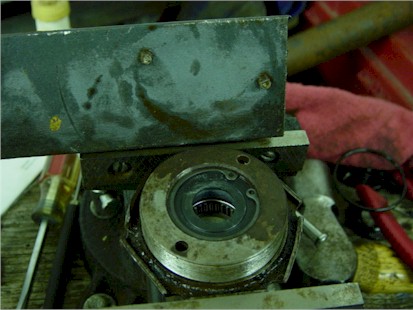
| Install the new snap ring. |
| Photo 11 |
|
|
| Remove old O-ring and install new one. |
| Photo 12 |
|
|
| Wrap a layer of electrical tape around the splines to protect the new dust boot. |
| Photo 13 |
|
|
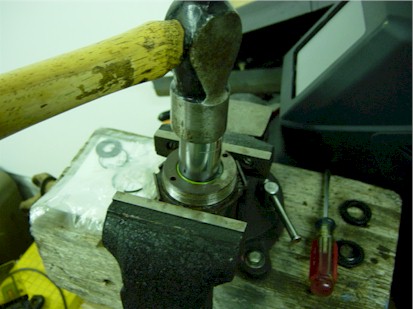
| I mad a spanner tool with a piece of angle iron and two bolts to assist in tightening the cap screw. |
| Photo 14 |
|
|
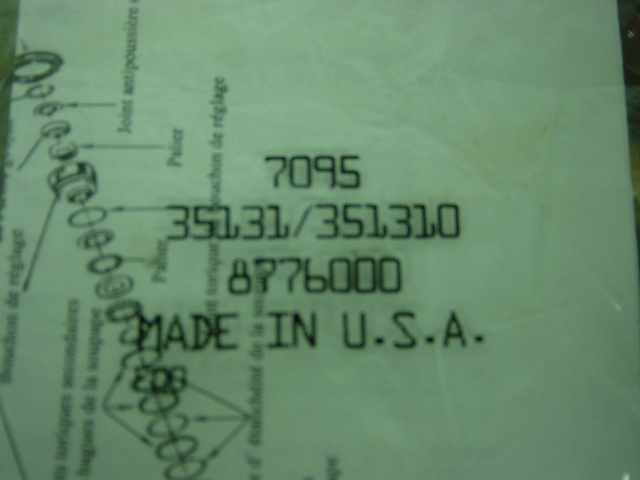
| This is the part number from Advance Auto for the new seal kit. #7095 |
Any questions, comments or suggestions for imporvements are always welcome.
|